")
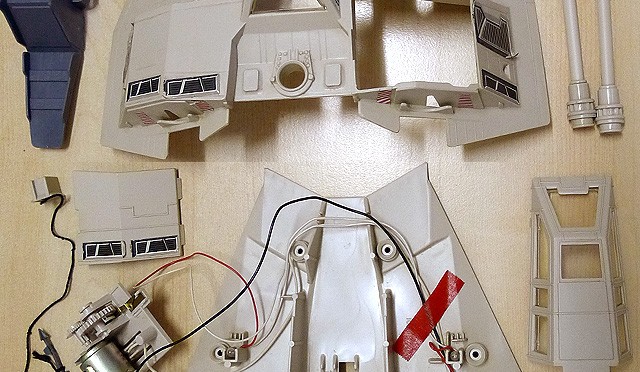
A few weeks back I had some spare time on a Friday morning so I decided to have a go at taking apart my vintage Snowspeeder in order that I might fix the electronics inside. I mean, it’s winter after all. Every self-respecting Snowspeeder owner should be able to shoot laser beams if the occasion calls for it.
As is often the case with taking apart old toys, the exercise turned out to be much more about cleaning than actually fixing. After I finished removing the dust and grime I couldn’t help but notice how beautiful the parts looked. Clean, yes, but more than that the disassembled lot of parts almost seemed to come alive. Decades-old secrets finally revealed.
So it goes without saying: if you collect this stuff and have ever thought about getting under the hood to see what’s inside, I say go for it. It’s a rewarding experience on many levels. And specifically if you want to pull apart your vintage Snowspeeder to fix the lights and sounds, chances are all you need to do is get down to the tiny motor and assist it in turning a few times while you hold down the button. Once it’s freed up a bit you’ll be amazed how quickly it returns to its original action.
Oh, one last thing. After I took this photo I noticed that one part did not make it into the frame. Are you Star Wars geek enough to know which part it is? Be the first to name it in the comments below and you just might win a cool prize. (One guess per person please.)
Buying Notes on the Vintage Snowspeeder
Check out the current vintage Snowspeeder listings here.
If you’re a collector of loose Kenner vehicles from the vintage Star Wars run and you don’t own the vintage Snowspeeder yet, it’s time to turn that ship around. Ounce for ounce, this is my favorite vehicle for the whole ’78 to ’85 period.
For overall look the Snowspeeder’s got it where it counts. Add on the awesome lights and sound and you can see why we’ve got gold medal material. The harpoon and cool kickstand are icing on the cake.
Ready to climb aboard? Just keep in mind this checklist before going off half cocked on eBay:
1. The Snowspeeder’s lights and sounds are integral to your enjoyment factor. Make sure they both work before bidding. Sure you could take it apart and horse around with fixing the electronics, but that’s something to avoid unless you’ve really got the feel for it.
2. This vehicle has a ton of stickers applied to it. Something like 27 to be exact. Try to get a good feel that they’re all there and not peeling up. For this reason you might want to focus on the Snowspeeders that have clearly been kept over the years with their original box. I’ve seen a strong correlation between a present original box and nice looking stickers.
3. The rear harpoon with its black tether are a MUST. Make sure its there!
Best of luck, and if you have any other thoughts feel free to add them in the comments below.
Leave a Reply to ratherchildish Cancel reply